Shimming Guide
First off, we will be showing you the bevel to pinion method. We have found this to be the most practical and effective way of
shimming an AEG. The reason you will want to shim your AEG is to get it to run more smoothly and efficiently. As long as it is not the quality of the gears itself that is creating the "whining" noise, shimming along with adjusting the motor height can also significantly decrease or get rid of the "whining" sound some guns make. The main reason, however, for shimming your AEG is to reduce unnecessary friction to increase efficiency and durability. Now, lets get into how you can Shim you AEG.
What you need:
-Screwdriver (any tools that you will need to disassemble your gearbox)
-An assortment of shims
-White lithium grease
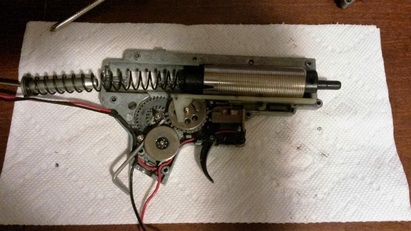
Step 1: After your gearbox is disassembled, take out the spring guide and spring.
shimming an AEG. The reason you will want to shim your AEG is to get it to run more smoothly and efficiently. As long as it is not the quality of the gears itself that is creating the "whining" noise, shimming along with adjusting the motor height can also significantly decrease or get rid of the "whining" sound some guns make. The main reason, however, for shimming your AEG is to reduce unnecessary friction to increase efficiency and durability. Now, lets get into how you can Shim you AEG.
What you need:
-Screwdriver (any tools that you will need to disassemble your gearbox)
-An assortment of shims
-White lithium grease
Step 1: After your gearbox is disassembled, take out the spring guide and spring.
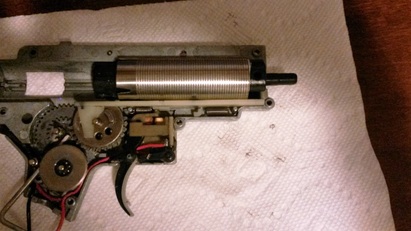
Step 2: Remove the tension on the tappet plate by removing the spring. After this spring is removed, you may remove the entire cylinder assembly.
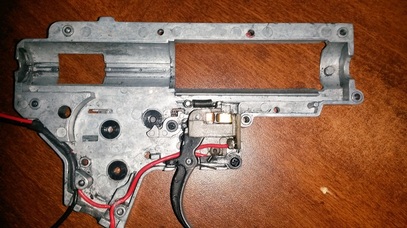
Step 3: Remove all the gears and take off any existing shims. It is also a good idea to remove the existing grease off of the gears and gearbox shell.
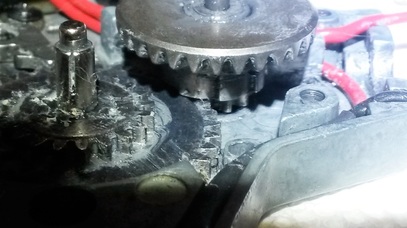
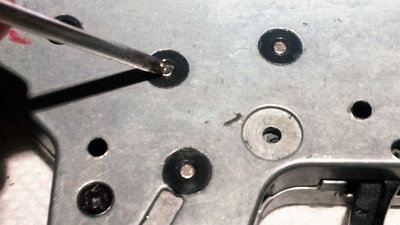
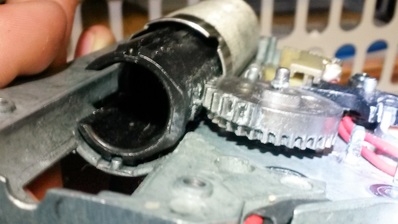
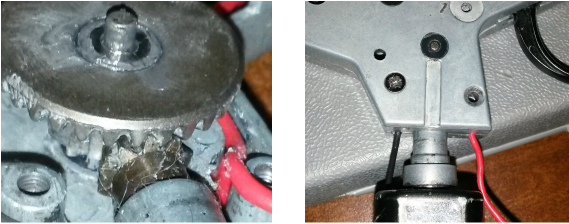 (Left) Bevel gear properly meshing with a pinion gear. (Right) Testing the bevel gear shimming.
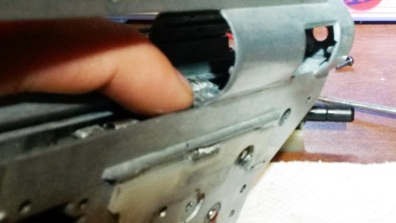
Step 4: Put the bevel gear back in the gearbox to test how the motor meshes with the bevel gear. The best way to go about this that we have found is to close the gearbox with the bevel gear in it, then insert the motor straight into the gearbox (as seen to the right). What you want to look for is the lateral movement of the gear shaft when the motor is inserted into the gearbox. To get a good mesh, you want to shim it until it gets to a point where once you put the motor in, it does not more much anymore; it should remain in the same position whether the motor is in the gearbox or not. This should be done with a few screws in the gearbox, to ensure the gear is not shimmed to tightly when the gearbox is closed.
Step 5: Once your bevel gear is shimmed to the pinion (motor) gear, place the spur gear into the gearbox. Now, with the gearbox open, check the bevel-spur gear mesh. Now place shims underneath the spur gear until the teeth of the spur gear maintain full contact with the teeth on the bevel gear. Finally close the gearbox and tighten a few screws, and check to make sure it spins freely.
*It is important to keep the spur gear as low as possible to the gearbox shell, without it making contact with the shell while still meshing properly with the bevel gear. This will give the system better efficiency.
*It is important to keep the spur gear as low as possible to the gearbox shell, without it making contact with the shell while still meshing properly with the bevel gear. This will give the system better efficiency.
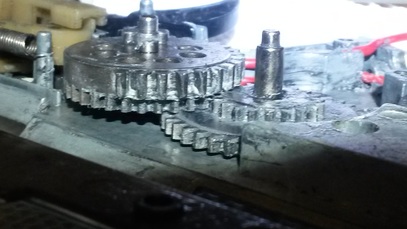
Step 6: Remove the bevel gear (making sure you keep the shims on the gear axle). Next place the sector gear in the gearbox and adjust the height of it using shims so that the sector gear comes as close to the spur gear as possible without rubbing against it (as seen in the picture below).
*An easy way of telling whether it is shimmed perfectly is to put grease on the top of the spur gear; if it is correctly shimmed it should make a swirl pattern of the grease.
*An easy way of telling whether it is shimmed perfectly is to put grease on the top of the spur gear; if it is correctly shimmed it should make a swirl pattern of the grease.
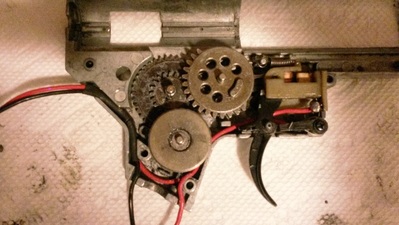
Step 7: Now place the bevel gear back into the gearbox so that all three gears are in place.
Step 8: Close the gearbox with few screws to put pressure on all of the gears. Using your finger, reach through the top of the gearbox to spin the sector gear. The set of gears should spin freely with minimal resistance (about 2-5 rotations).
Step 9: Gently push on the axles of the gears to ensure that they have minimal lateral play.
Step 10: Next, place the cylinder assembly (including the piston) into the gearbox and ensure that the sector gear makes full contact with the piston teeth.
You're done! Now just re-lubricate all the gears, and the cylinder assembly. Finally, put your gearbox back together and reassemble your airsoft gun. Your gearbox should now run a lot smoother and more efficiently.
